Painting and Decaling the NAS-T-JET
You CAN do it yourself
Follow along and you too will be able to paint and decal your own HO scale slot car bodies

The latest NAS-T-JETS I've done on my track
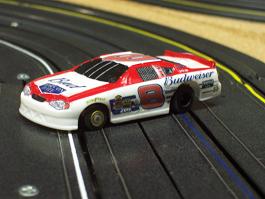
The 8 and 14 cars are resin which Greg Davis made for me. I don't even use primer. Just clean the body real well with dishwashing liquid or wipe them down with alcohol to remove any of the releasing agent used in the casting process. These bodies are usually set up on a running chassis. This means there are resin crumbs from grinding to get the best handling characteristics from this big body. Oil from the chassis will get inside and sometimes on the painted area of the body. Clean all of this off thoroughly prior to the painting process for the best results.
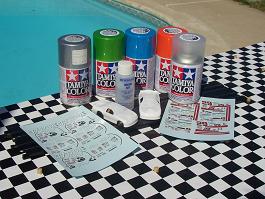
These are the products used to detail these cars
The Tamiya paint dries quickly. You can mask and tape a body to shoot an accent color only one hour after laying the first color. This paint also resists oils and the other stuff that can come from your T-jet chassis.
The decals were purchased on the internet. It's a very good product. It's got great detail and each sheet in HO scale has up to 3 sets. This allows some margin for error. I was able to use the extra headlights from the Taz sheet to detail the already started '3' car. BONUS. Contact me RMickey4@msn.com to get details on how to get some of these decals.
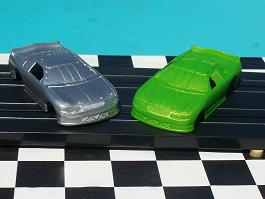
Here are the bodies with their first coat of paint
Just can't say enough good about the Tamiya paint. It's also available in a bottle for those who've got their own airbrush.
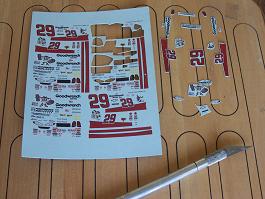
Decals are cut very close to the image.
After cutting most of the decals out, lay them out in the order which they would be placed on the car. You can use the Action diecast website as a reference for placement of the decals on the body. These are the waterslide type decals. Dip them in water just prior to placing the backing as close to the place where the decals would be laid to rest on the body. Apply Micro Set solution to the area of the body where application will take place. This helps the decals adhere to the body and aids in sliding them into the right spot. The decals will also contour to the shape of the body and small crevices in the body better when you use the setting solution. Use a Q-tip to apply the setting solution and also roll out any bubbles from under the decals with the Q-tip.
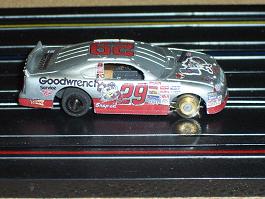
Almost finished, not quite
More detail will be added to various parts of this body. Shoot clear Tamiya paint over this body to protect the decals from the bumping and banging that will occur while racing in this class. Wait 'til you see the Timber Wolf car.
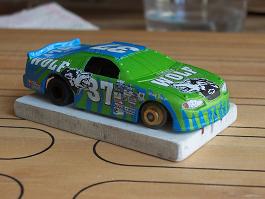
37 Timber Wolf car of the Busch series
This body took considerably more work. Click on the picture to see the step by step process that went into detailing this body. It was worth the 5 hours put into it.
2004 Daytona 500 Winner
Set up properly, the cars in this class can provide alot of fun for all of the combatants. It's fun to detail the bodies and run something you can be proud of. Maybe we'll have a Concours de Elegance in the future.